question

hypercoffeedude avatar image
hypercoffeedude asked

Connecting RPi with VenusOS MQTT to Home Assistant?

Hello everyone,

It seems almost any information a person would need from the Venus OS device is published to it's own local MQTT server. I have accessed that MQTT server from a client and was able to get voltages and other information out of it. The Raspberry Pi is connected to a Victron 100/15 SmartSolar via a USB to TTL adapter and I can access the information and settings for it from Venus so that is not a problem. I understand the Venus MQTT requires a keep alive message to be sent about once every 60 seconds. I also already run an MQTT server and Home Assistant on another Raspberry Pi that I use for everything else.

How can I get the data I want (or all of it) into Home Assistant? Preferably, I just need to get Venus to send the messages to my normal MQTT server instead of it's own, or maybe a script that subscribes to the Venus MQTT, publishes a keep alive once every 60 seconds, and then forwards all received messages to the normal MQTT?

Venus OSRaspberry PiMQTThome assistant
2 |3000

Up to 8 attachments (including images) can be used with a maximum of 190.8 MiB each and 286.6 MiB total.

5 Answers
sinbad avatar image
sinbad answered ·

HomeAssistant has Modbus functionality built in :)

Just enable modbus-TCP on your Venus device, and config is like so:

Main config file: add

modbus: !include modbus.yaml


Modbus config file:


  1. # cat modbus.yaml
  2. name: victron
  3. type: tcp
  4. host: <ip of venus goes here>
  5. port: 502


Then in your sensors config:

  1. - platform: modbus
  2. registers:
  3. - name: Grid power
  4. hub: victron
  5. unit_of_measurement: "W"
  6. slave: 100
  7. register: 820
  8. - name: Solar power
  9. hub: victron
  10. unit_of_measurement: "W"
  11. slave: 100
  12. register: 850
  13. - name: Load
  14. hub: victron
  15. unit_of_measurement: "W"
  16. slave: 100
  17. register: 817
  18. - name: Battery
  19. hub: victron
  20. unit_of_measurement: "%"
  21. slave: 100
  22. register: 843


Some of the slave numbers may differ if you're using something other than a CCGX - not sure.


You can also write the settable modbus registers, I use a switch to set the Grid power setpoint:

in switches.yaml:

  1. - platform: modbus
  2. registers:
  3. - name: Charge
  4. hub: victron
  5. slave: 100
  6. register: 2700
  7. command_on: 4000
  8. command_off: 80
  9. verify_state: false
10 comments
2 |3000

Up to 8 attachments (including images) can be used with a maximum of 190.8 MiB each and 286.6 MiB total.

hypercoffeedude avatar image hypercoffeedude commented ·

Thanks so much! This worked perfectly! I had no idea it would be that easy :)

0 Likes 0 ·
sinbad avatar image sinbad hypercoffeedude commented ·

Only a pleasure :D

0 Likes 0 ·
fenix avatar image fenix sinbad commented ·

Hi


how do we define the unique id to read ?

0 Likes 0 ·
georgelza avatar image georgelza commented ·

how where do we get the relevant registers to use ?

G

0 Likes 0 ·
georgelza avatar image georgelza commented ·

Where would we get the register numbers to use, and what they map to.

I see you've used slave: 100 throughout, how where do we check this value for our own implementation ?

That command_on: 4000 and command_off: 80, where do we confirm that ours are the same or is that default.

G

0 Likes 0 ·
sinbad avatar image sinbad georgelza commented ·

Hi

There are links elsewhere to the excel spreadsheet that has the addresses for slave and register number.

The 4000 and 80 are the target grid values I want to set - so 80W when running normally, and 4000W when charging manually. It's not the most logical way of doing it, but it works for me. The system puts the difference between (grid target + solar - house draw) into charging the battery.

0 Likes 0 ·
buzzlightyear avatar image buzzlightyear commented ·

The link to the spreadsheet is https://github.com/victronenergy/dbus_modbustcp/blob/master/CCGX-Modbus-TCP-register-list.xlsx

0 Likes 0 ·
denzel avatar image denzel commented ·

Hi,


Does this code go into the configuration.yaml file or is there a new file created. Please can you post the steps.


Regards

0 Likes 0 ·
fenix avatar image fenix commented ·

hello


is there a way to show the text base on the value in Home Assistant

i did the mapping, everything work but sytem retour value.. would be nice to see the text

example :

dbus-service-name = com.victronenergy.solarcharger

description = Charge state

Address = 775

0=Off;2=Fault;3=Bulk;4=Absorption;5=Float;6=Storage;7=Equalize;11=Other (Hub-1);252=External control


0 Likes 0 ·
Keith Weinheimer avatar image Keith Weinheimer fenix commented ·

just learning this myself but you can map the numbers to text using a mapper like this where "solar_small_state_num" is the name of your sensor reading the numeric state output from the mppt

  1. # -- RV SYSTEM
  2. # Modbus device (slave) IDs: /!\ Only for my system
  3. # BMV 245
  4. # MPPT Big Panels 239
  5. # MPPT Small Panels 243
  6. # Quattro 242
  7. # Main System 100
  8.  
  9. # MPPT Small Panels 243
  10. - name: "Solar Small State Num"
  11. hub: VenusGX
  12. slave: 243
  13. register: 775


  1. - platform: template
  2. sensors:
  3. solar_small_state_text:
  4. friendly_name: "Solar Small State"
  5. # 0=Off;2=Fault;3=Bulk;4=Absorption;5=Float;6=Storage;7=Equalize;11=Other (Hub-1);252=External control
  6. value_template: >-
  7. {% set mapper = {
  8. '0' : 'Off',
  9. '2' : 'Fault',
  10. '3' : 'Bulk',
  11. '4' : 'Absorption',
  12. '5' : 'Float' } %}
  13. {% set state = states.sensor.solar_small_state_num.state %}
  14. {
  15. { mapper[state] if state in mapper else 'Unknown' }}


0 Likes 0 ·
Todd Wackford avatar image
Todd Wackford answered ·

While I do not use home assistant, I use SmartThings for my IoT flavor of choice. But it should be pretty similar in functionality. Do you have API access and the ability to create device definitions in HA?

What I did is create a python script that reads the Victron modbus tcp registers every 5 minutes and send that data to an self defined device end points in SmartThings. I set the python scrip to fire via a cron job on the Rpi. Once the SmartThings devices receive the data, I can create all kinds of rules based on data thresholds. Like turn off certain outlets if SOC gets down to certain point. Or, flash some lights when SOC is 100%. etc, etc.

Anyway, google "victron python modbus tcp". That will get you going down the "rabbit hole" as they say.

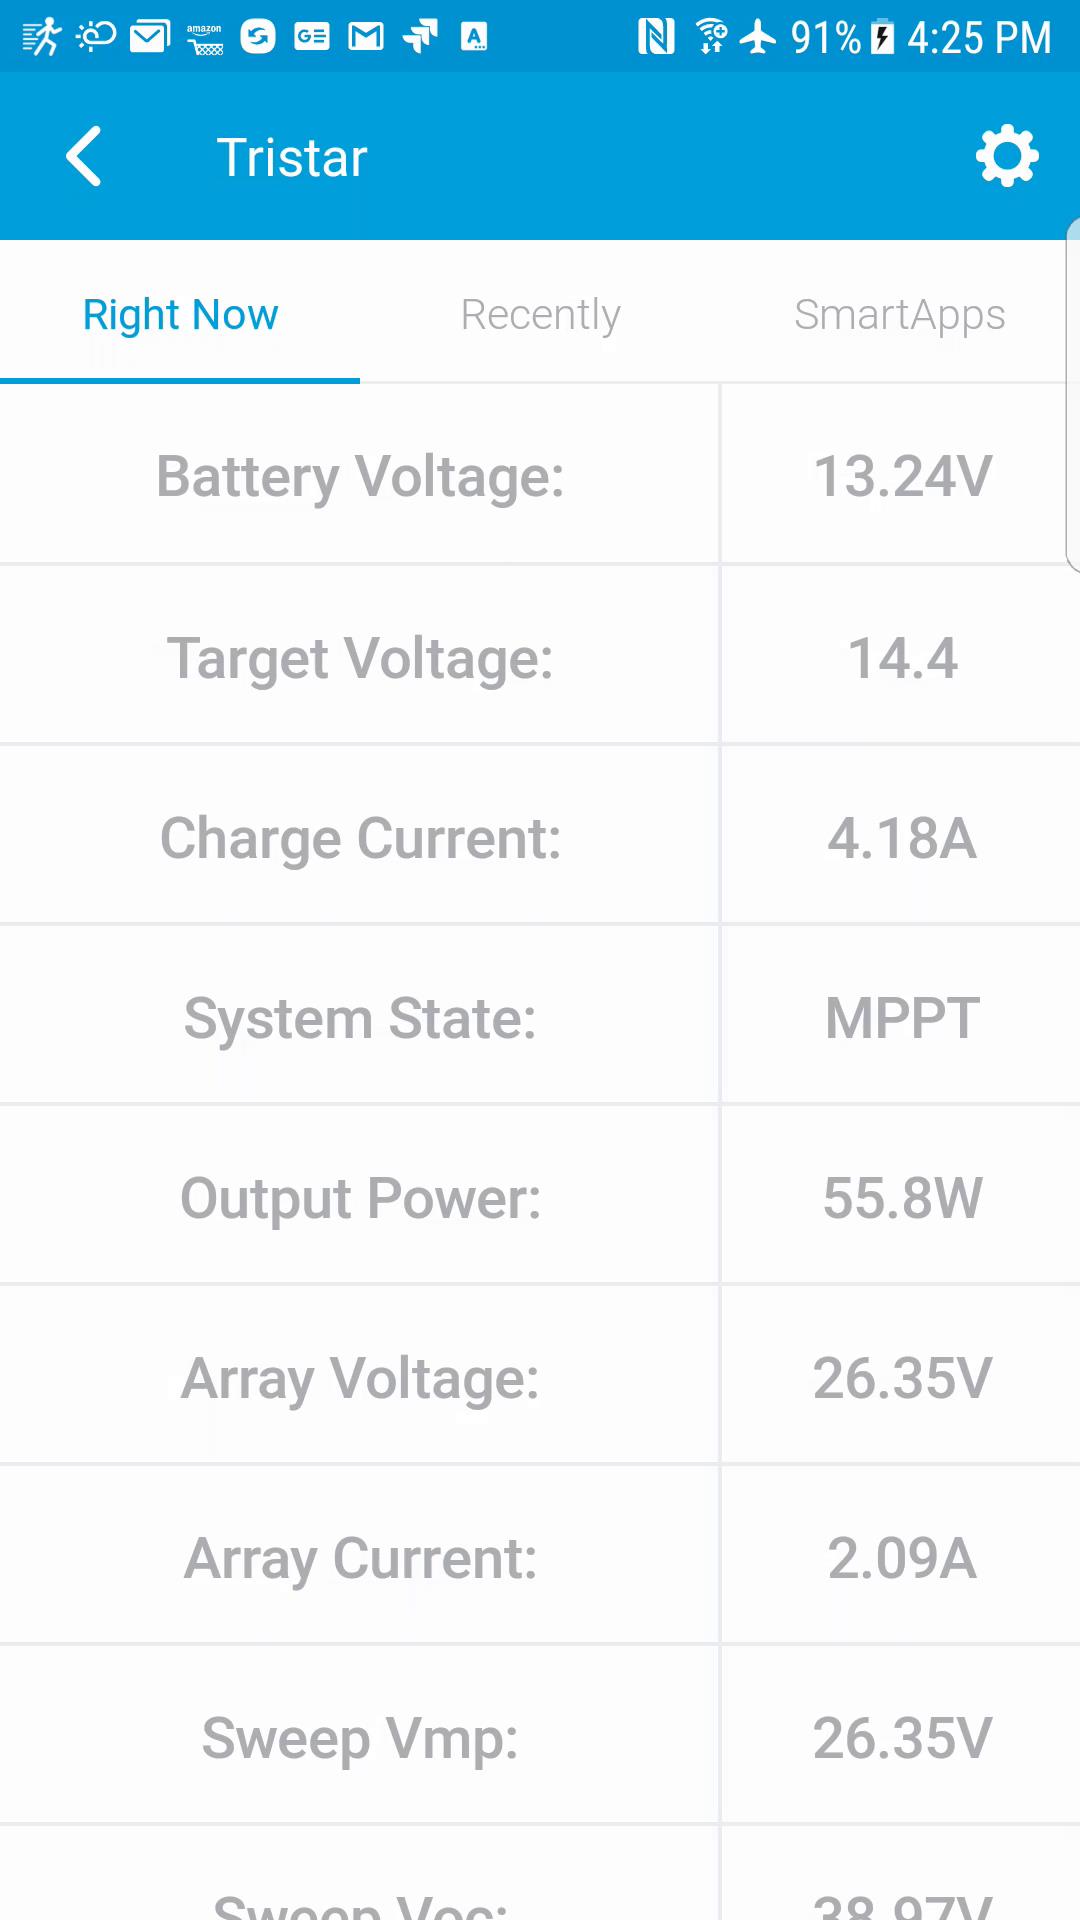
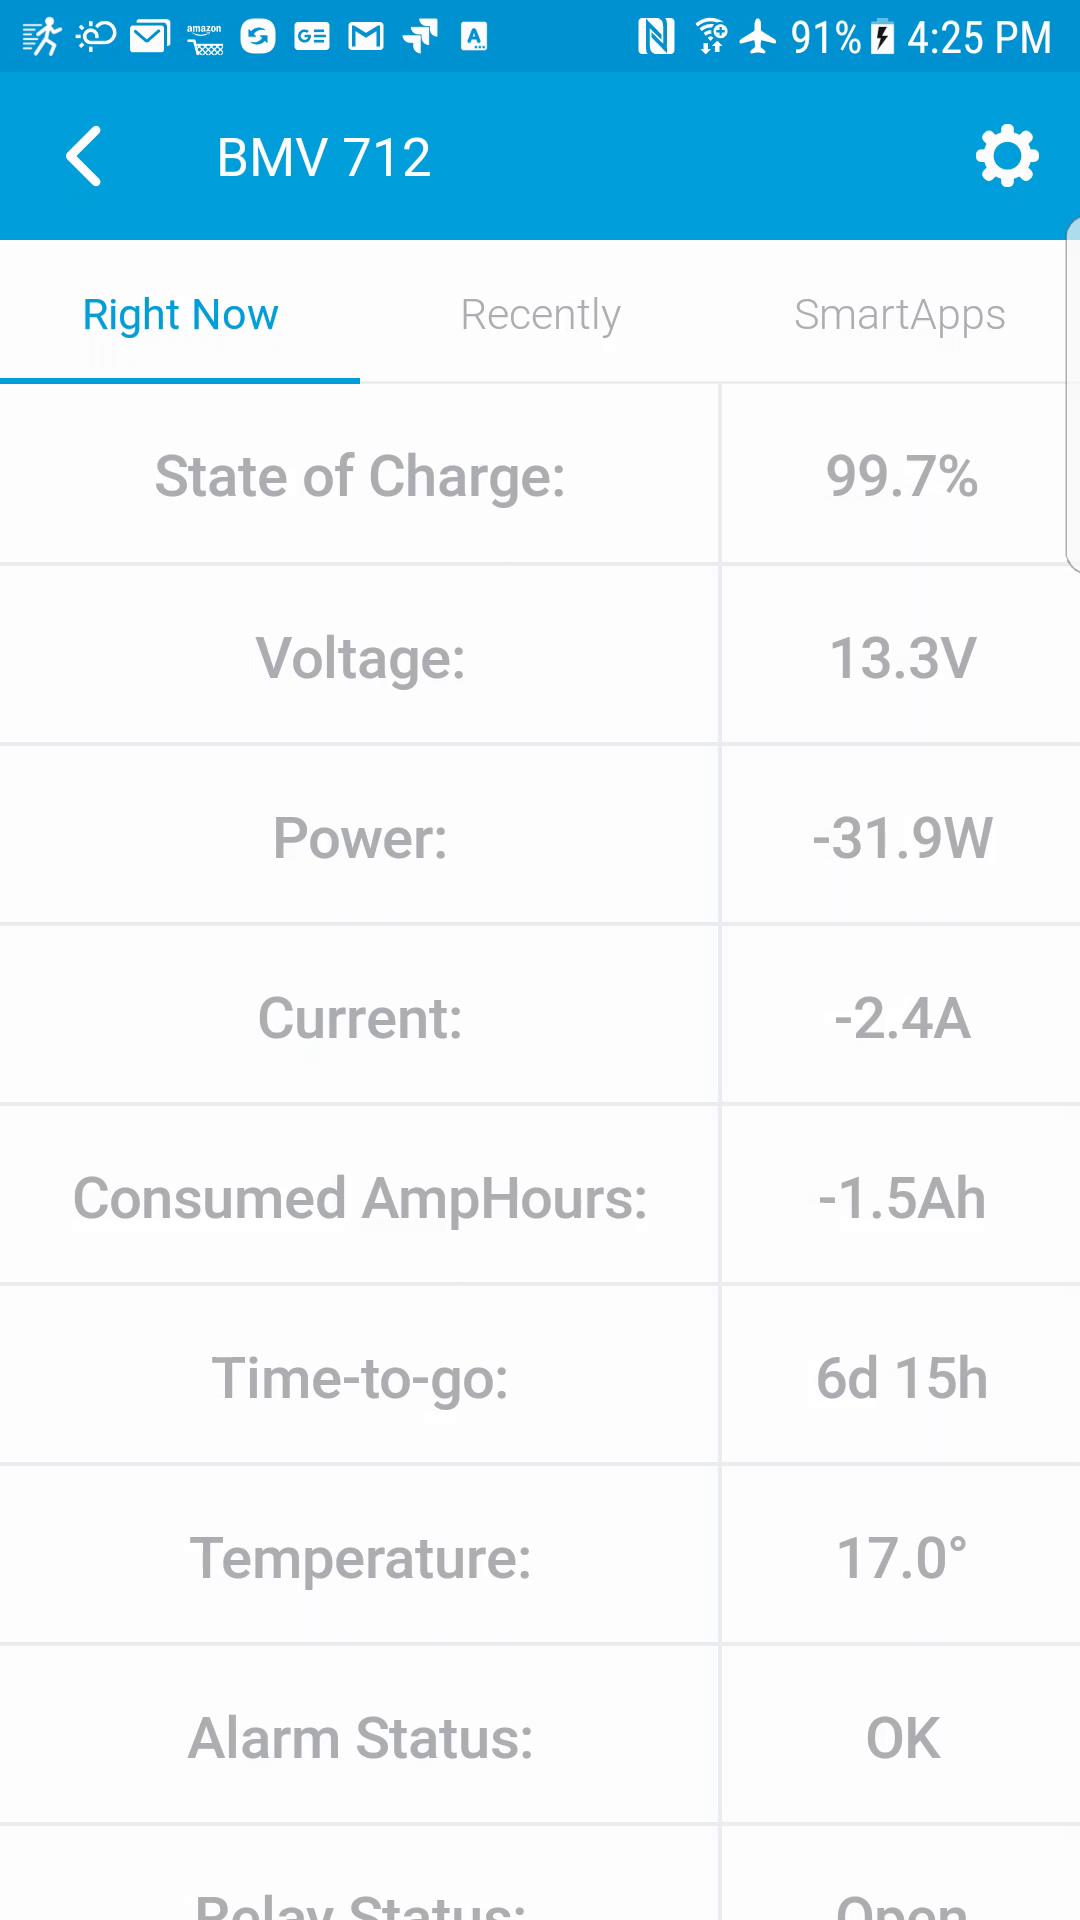
BTW, here's some screenshots of the devices I created. One for my BMV-712 and one for my Morningstar MPPT 60 Solar Charge controller.


Solar


1 comment
2 |3000

Up to 8 attachments (including images) can be used with a maximum of 190.8 MiB each and 286.6 MiB total.

groundattack avatar image groundattack commented ·

I'd love to get a copy of that Python script. You have done what I was about to try to do.

0 Likes 0 ·
georgelza avatar image
georgelza answered ·

I think I'm with you on that one GroundAttack, @Todd Wackford, any chance you might be willing to post the script here.
G

1 comment
2 |3000

Up to 8 attachments (including images) can be used with a maximum of 190.8 MiB each and 286.6 MiB total.

groundattack avatar image groundattack commented ·

I have just been using Node Red addon for HomeAssistant and using MQTT to query and control Venus.

I tried other routes, but for me that is the simplest.

0 Likes 0 ·
Todd Wackford avatar image
Todd Wackford answered ·

@georgelza,

Here is the Python script. I have it run from a cron job every 5 minutes. I'm assuming you have SmartThings. You will need to change lines 131 and 133 to input your credentials and ID for SmartThings. Hope this helps you out.


  1. #!/usr/bin/env python
  2.  
  3. #
  4.  
  5. from pymodbus.client.sync import ModbusTcpClient as ModbusClient
  6. from pymodbus.constants import Endian
  7. from pymodbus.payload import BinaryPayloadDecoder
  8. from pymodbus.payload import BinaryPayloadBuilder
  9. from pymodbus.client.sync import ModbusTcpClient as ModbusClient
  10. from pymodbus.compat import iteritems
  11. import time
  12. import sys
  13. import json
  14. import httplib
  15.  
  16. def ConvertSectoDay(n):
  17.     if n == 0:
  18.         return "infinite"
  19.     
  20.     day = n // (24 * 3600)
  21.     n = n % (24 * 3600)
  22.     hour = n // 3600
  23.  
  24.     n %= 3600
  25.     minutes = n // 60
  26.  
  27.     n %= 60
  28.     seconds = n
  29.     #need to  add if statement to send minutes when less then one day
  30.     if day > 0:
  31.         return(str(int(day)) + 'd ' + str(int(hour)) + 'h')
  32.     else:
  33.         return(str(int(hour)) + 'h ' + str(int(minutes)) + 'm')
  34.  
  35.         
  36. ####################           Main section of code           ####################
  37. # configure the client logging
  38. import logging
  39. logging.basicConfig()
  40. log = logging.getLogger('./modbus.error')
  41. log.setLevel(logging.ERROR)
  42.  
  43.  
  44. #Define variables for the connection
  45. host = '192.168.10.92' #this is IP of the venus GX
  46. port = 502
  47. systemUnitId = 238   
  48.  
  49. #Make the connection to the Venus Device
  50. client = ModbusClient(host,port)
  51. client.connect()
  52.  
  53. # Define the output json object and initialize with some SmartThings needed information
  54. jsonOut = { "event" : "batteryUpdate", "dni" : "bmv712", "data": {} }
  55.  
  56. #map out our scale values to use for the measurement types
  57. v_scale =   100 #volts
  58. i_scale =   10  #current
  59. t_scale =   10  #temperature
  60. ah_scale =  -10 #Amp hours
  61. no_scale =  1   #No scaling
  62. time2Go_scale = .01 #Time to go
  63.  
  64. # Setup up a data mapping object to use for processing and name/value pairs
  65. from collections import namedtuple
  66.  
  67. # Read the registers and add to our records object
  68. measurementType = namedtuple('measurementType', 'name address scale type')
  69. records = []
  70. records.append(measurementType(name='voltageMeasurement', address=259, scale=v_scale, type='uint'))
  71. records.append(measurementType(name='current', address=261, scale=i_scale, type='int'))
  72. records.append(measurementType(name='temperature', address=262, scale=t_scale, type='int'))
  73. records.append(measurementType(name='consumedAmpHours', address=265, scale=ah_scale, type='uint'))
  74. records.append(measurementType(name='battery', address=266, scale=i_scale, type='uint'))
  75. records.append(measurementType(name='alarm', address=268, scale=no_scale, type='uint'))
  76. records.append(measurementType(name='relayStatus', address=280, scale=no_scale, type='uint'))
  77. records.append(measurementType(name='deepestDischarge', address=281, scale=ah_scale, type='uint'))
  78. records.append(measurementType(name='lastDischarge', address=282, scale=ah_scale, type='uint'))
  79. records.append(measurementType(name='averageDischarge', address=283, scale=ah_scale, type='uint'))
  80. records.append(measurementType(name='chargeCycles', address=284, scale=no_scale, type='uint'))
  81. records.append(measurementType(name='batteryTimeToGo', address=303, scale=time2Go_scale, type='uint'))
  82.  
  83. # Cycle thru records, scale the values and populate the json object
  84. for record in records:
  85.     result = client.read_holding_registers(record.address, count=1,  unit=systemUnitId)
  86.     decoder = BinaryPayloadDecoder.fromRegisters(result.registers, Endian.Big)
  87.     if record.type == 'uint':
  88.         value = decoder.decode_16bit_uint()
  89.     else:
  90.         value = decoder.decode_16bit_int()
  91.         
  92.     jsonOut['data'][record.name] = float(value)/record.scale
  93.     
  94. #Now handle any additions or reformatting that we may need to do
  95. #Battery Power
  96. jsonOut['data']['power'] = round(jsonOut['data']['current']*jsonOut['data']['voltageMeasurement'], 1)
  97.  
  98. #Relay status
  99. relayStates = ['Open', 'Closed']
  100. jsonOut['data']['relayStatus'] = relayStates[int(jsonOut['data']['relayStatus'])]
  101.  
  102. #alarm status
  103. alarmStates = ['OK', 'Alert']
  104. if jsonOut['data']['alarm'] > 0.5:
  105.     state = 1
  106. else:
  107.     state = 0
  108. jsonOut['data']['alarm'] = alarmStates[state]
  109.  
  110. #Time to go
  111. jsonOut['data']['batteryTimeToGo']  = ConvertSectoDay(jsonOut['data']['batteryTimeToGo'])
  112.  
  113. #we have all the data.
  114. batteryJson = json.dumps(jsonOut)
  115. client.close()
  116.  
  117. #show the json data on the console
  118. print("---------------- JSON of Battery Data from Venus GX ----------------------")
  119. print(batteryJson)
  120. print("----------------              END OF JSON           ----------------------")
  121.  
  122.  
  123. #Now open a connection to SmartThings and dump the data Venus (Connect) App.
  124. conn = httplib.HTTPSConnection("graph.api.smartthings.com:443")
  125. payload = batteryJson
  126. headers = {
  127.     'content-type': "application/json",
  128.     'authorization': "Bearer #ST TOKEN HERE#"
  129.     }
  130. conn.request("POST", "/api/smartapps/installations/#installation ID here#/appHook", payload, headers)
  131. r1 = conn.getresponse()
  132. print r1.status, r1.reason
  133.  
  134. #TODO: Need to do some sort of error handling if SmartThings response has error.
  135. conn.close()
5 comments
2 |3000

Up to 8 attachments (including images) can be used with a maximum of 190.8 MiB each and 286.6 MiB total.

georgelza avatar image georgelza commented ·

awesome, thanks.

Question, the address values, guessing thats my device id's ? as per the VRM interface ?

or... where do I get a list of all the addresses and what they are mapped to

G

0 Likes 0 ·
Todd Wackford avatar image Todd Wackford georgelza commented ·

Start here:
https://www.victronenergy.com/live/ccgx:modbustcp_faq

0 Likes 0 ·
groundattack avatar image groundattack Todd Wackford commented ·

Double awesome!

I'd love to see the Smartthings Groovy code. It would save a lot of bald head scratching! When you get a chance...

0 Likes 0 ·
gilbert avatar image gilbert Todd Wackford commented ·

Tod can you share the work you did here? I would love to pull this into smartthings. Have you managed to set automations from this? Ie let the geyser run when there is excess production etc?


0 Likes 0 ·
irwinr avatar image irwinr Todd Wackford commented ·

I'd like to second the request for the Groovy code as well, if it's available. :)

0 Likes 0 ·
mkh avatar image
mkh answered ·

Using modbus to get data into Home asistant is easy and simple way. Unfortunately has one restriction. Unlike MQTT it will work only if Venus and Home assistant are on the same local network.

I have instalation in camper, so if I left home wifi network, cerbo gx will get different ip from LTE modem and modbus connection will not work.

I would rather prefere if cerbo GX can transfer data to my MQTT server.

1 comment
2 |3000

Up to 8 attachments (including images) can be used with a maximum of 190.8 MiB each and 286.6 MiB total.

Sam Wutschke avatar image Sam Wutschke commented ·

Totally true, and it can!

In the same settings, you can enable MQTT in the Venus OS.

0 Likes 0 ·

Related Resources

Victron Venus OS Open Source intro page

Venus OS GitHub (please do not post to this)

Additional resources still need to be added for this topic

Raspberry Pi running Victron’s Venus firmware - Blog Post

Venus OS Large image: Signal K and Node-RED - Install

raspberrypi install venus image


Victron MQTT readme

Additional resources still need to be added for this topic